Home Security
How to Secure Your Home with Cameras: Placement & Setup
By Elena Vargas | Published April 2, 2025 | Updated July 22, 2025
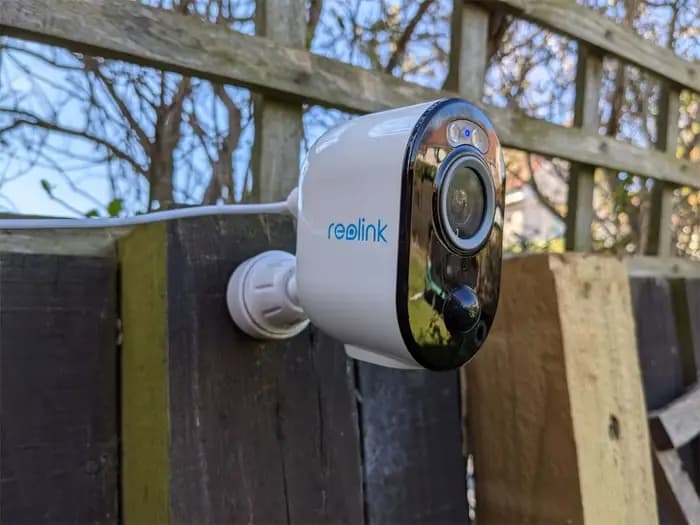
The right cameras matter less than where you put them and how you use the alerts. A well-placed 2K camera at a door outperforms a cluster of poorly aimed 4K units that flood your phone with noise. If you are planning around a Reolink Argus PT Ultra Review, remember that camera placement and alert tuning matter more than any single spec sheet win.
This guide covers placement strategy, the entry points that deserve priority, notification hygiene, two-way audio, and privacy practices that keep your system useful—and respectful of neighbors and household members.
Build a Placement Strategy Before You Buy
Walk the property as a stranger would: approach from the street, side yards, and any alley or shared driveway. Note sightlines, lighting, and where a person could linger without being seen from inside.
Map cameras to jobs, not rooms. One camera per critical approach is better than overlapping coverage that creates duplicate alerts. Plan power or PoE runs early—placement that only works with a weak Wi-Fi hop will fail when you need it most.
- Prioritize approaches a burglar would actually use
- Aim for face-height capture at doors, not just overhead crowns
- Avoid pointing cameras into neighbors’ windows or private yards
Cover the Highest-Risk Entry Points First
Most residential break-ins target doors and ground-floor windows. Cover the front door, back door or patio, garage side door, and any basement or side entrance before you invest in decorative yard cameras.
Driveways and gates benefit from a wider view that captures vehicles and people approaching the property. Pair that with a tighter door camera so you can identify faces when someone is close enough to knock.
Height, Angle, and Lighting Tips
Mount outdoor cameras high enough to resist tampering (often 8–10 feet) but angled down so faces are readable. Straight-on porch mounts at head height look great in demos and get stolen or vandalized in practice.
Watch for backlight: a camera facing a bright street at dusk can silhouette visitors. Use WDR/HDR modes when available, add subtle porch lighting, or shift the mount slightly so ambient light helps rather than blinds the sensor.
Keep lenses clear of roof runoff, sprinklers, and spider-friendly corners. A dirty dome creates more “mystery blobs” than any AI detector can fix.
Notifications That You Will Actually Trust
Alert fatigue is the most common reason camera systems stop being useful. Turn on person and vehicle filters where available, shrink activity zones to paths and doors, and schedule quieter hours for areas that only need daytime monitoring.
Use rich notifications with thumbnails so you can dismiss package drops or known visitors quickly. Reserve push alerts for people at primary entries; let secondary cameras record silently or notify only on repeated events.
- Enable person/vehicle detection and tune sensitivity
- Draw activity zones away from trees, flags, and busy roads
- Separate “must wake me” cameras from “record only” cameras
Two-Way Audio: When It Helps and When It Doesn’t
Two-way talk is excellent for deterring porch loitering, directing delivery drivers, and checking on family members arriving home. Place talk-capable cameras at doors and gates where conversation is natural.
Skip aggressive sirens and speakers as your default response—false triggers escalate neighbor tension. Use verbal deterrence deliberately after you confirm a person on the live view, and keep volume reasonable for your setting.
Privacy, Law, and Household Boundaries
Point cameras at your property lines and common approaches—not into neighboring bedrooms, bathrooms, or private courtyards. Indoor cameras in shared spaces should be disclosed to guests and household members; avoid bedrooms and bathrooms unless there is a clear, consented need.
Lock down accounts with unique passwords and multi-factor authentication. Prefer local storage when you want footage to stay on-site, and review cloud retention and sharing settings so clips are not left public or indefinitely accessible.
Give temporary guest access carefully. Family members who only need live view should not inherit delete or share permissions by default.
A Practical Setup Checklist
After install, verify night footage for each camera, confirm recordings survive a short internet outage (for local systems), and run a walk-test of every entry with notifications enabled. Revisit zones seasonally—summer foliage and holiday decorations are classic false-alert sources.
- Doors and garage first, then driveway and yard
- Tamper-resistant height with face-readable angles
- Filtered alerts + tested night video
- Secure accounts, clear privacy boundaries, local backup if possible
Frequently Asked Questions
Where should I place outdoor security cameras?▾
Start with front and back doors, garage entries, and the driveway approach. Add yard or gate cameras only after those high-risk points are covered clearly.
How high should outdoor cameras be mounted?▾
Typically about 8–10 feet: high enough to resist easy tampering, angled downward so faces remain identifiable.
How do I reduce false motion alerts?▾
Use person/vehicle detection, shrink activity zones, avoid aiming at busy roads or moving trees, and schedule quieter notification hours when appropriate.
Is two-way audio worth enabling?▾
Yes at doors and gates for deliveries and deterrence. Use it after you confirm a person on live view rather than auto-sirens for every motion event.
Can my cameras point at a neighbor’s property?▾
Avoid aiming into private areas of neighboring homes. Focus on your property and shared approaches, and follow local recording laws.
Should indoor cameras be used in bedrooms?▾
Generally no, unless there is an explicit, consented need. Prefer common areas and always disclose cameras to household members and overnight guests.