AI Tools
Pacdora: The Best 3D Packaging Design Tool
By Daniel Reeves | Published July 24, 2025 | Updated July 24, 2025
I spent twenty years building barcode systems for retail packs, cartons, and labels. Most beginners do not fail at art. They fail at structure. Wrong dielines. Weak mockups. Codes that printers reject. If you came here by searching for a Pacdora Review, treat this guide as the practical version: how well it handles structure, mockups, and files that have to ship.
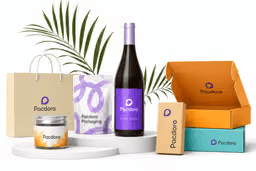
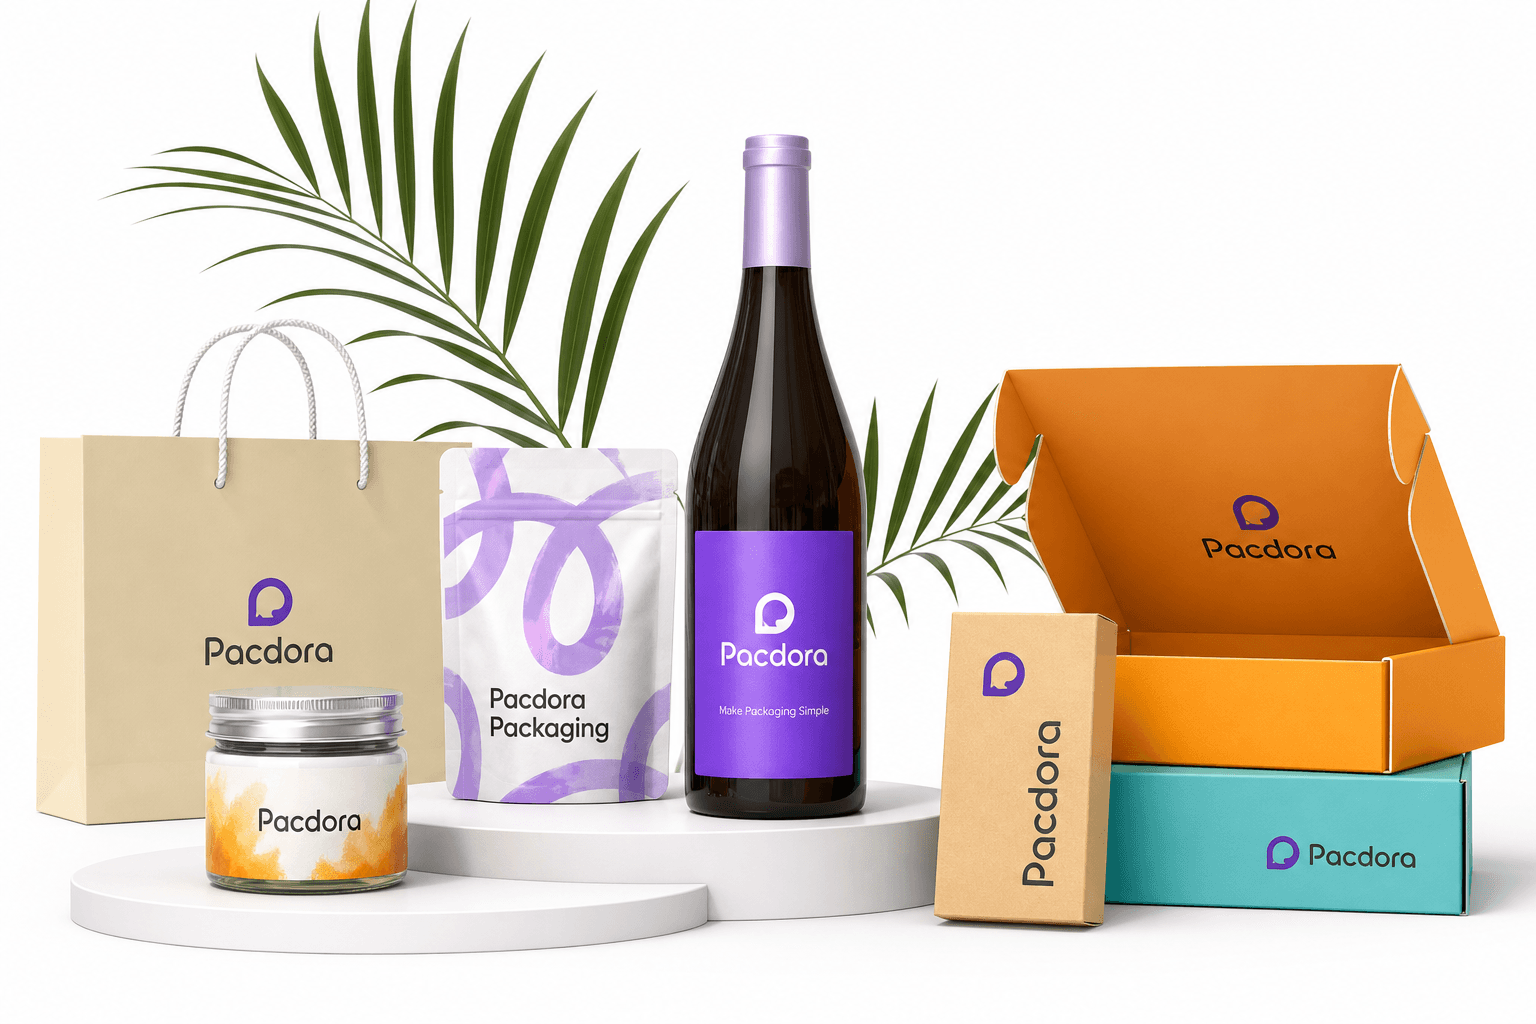
Pacdora is a browser tool for packaging mockups, box dieline templates, and 3D modeling. It will not replace a press operator. It will help you design product packaging faster and show clients a real 3D packaging mockup before you spend on samples.
This guide walks through the workflow that matters in production: textures and finishes in the 3D preview, designing on Pacdora dielines in Illustrator, choosing a plan that matches your volume, and stacking yearly billing with code DGET for 20% off.
Key takeaways
- Design on Pacdora dielines in Illustrator—lock the cut/fold layer, art on a layer above it.
- Hide die lines when you export mockup images. Keep them on for print files.
- Pacdora handles mockups and dielines. Use a separate barcode generator or UPC generator for retail codes.
- Most freelancers land on Pro yearly (~$199 → about $159 with DGET). Buy Business only when you need commercial or reseller rights.
- Stack Yearly billing + code DGET for Extra 20% off sitewide, then confirm the checkout total.
What Pacdora is (and what it is not)
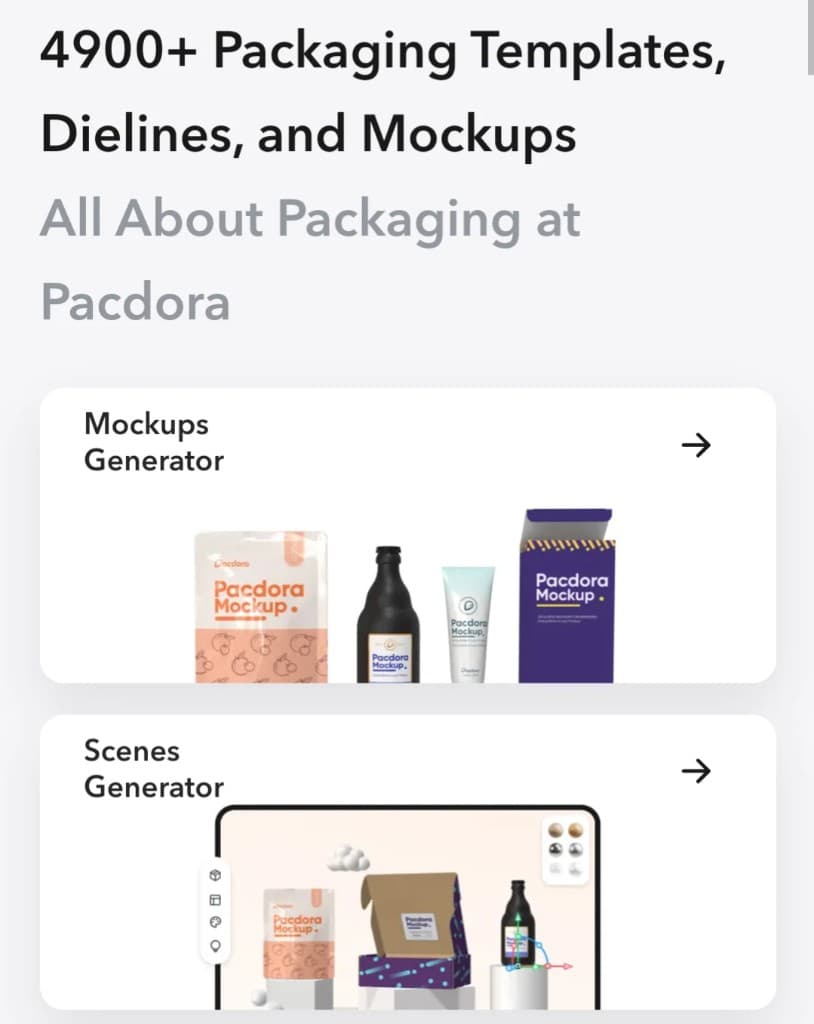
Pacdora is one of the stronger online options if you want a packaging mockup generator, a packaging dieline generator, and light AI packaging design in one place. You pick a structure. You size it. You preview it in 3D. You export files for Illustrator or print workflows.
It is not a free barcode generator for GS1 compliance by itself. Use a trusted UPC generator or barcode generator free tool for test codes. Then place the final barcode on your print artwork. Pacdora helps the box, pouch, bottle, or mailer look right. Your barcode library still owns code quality.
Think of Pacdora as the best packaging design software starter kit for founders, freelancers, and small brands. You get 5,000+ mockups and 3,000+ dieline templates. That covers product boxes, mailer boxes, pouches, cups, bottles, and more.
Can you add textures to the Pacdora preview?
Yes. In practice, you work in layers. Pacdora shows a 3D model of the pack. You apply artwork, materials, and finishes so kraft, gloss, soft-touch, or foil reads in the preview.
Here is the clean method I teach juniors. Keep die lines on their own locked layer. Design on a layer above them. Hide the die lines when you export a clean flat image for the mockup. Show them again when you check cut, fold, and bleed.
Do not paint over cut paths as if they are decoration. Die lines are manufacturing instructions. Artwork sits beside them, not on top of them as permanent ink. If a tutorial skips this, ignore that tutorial.
- Layer 1: Pacdora or printer die lines (locked, often magenta or spot)
- Layer 2: Bleed and safe area guides
- Layer 3: Brand art, photos, patterns, textures
- Layer 4: Barcode, QR, and legal text
- Export: hide guides and die lines for mockup images; keep them for print files
Should you design on Pacdora dielines or draw your own?
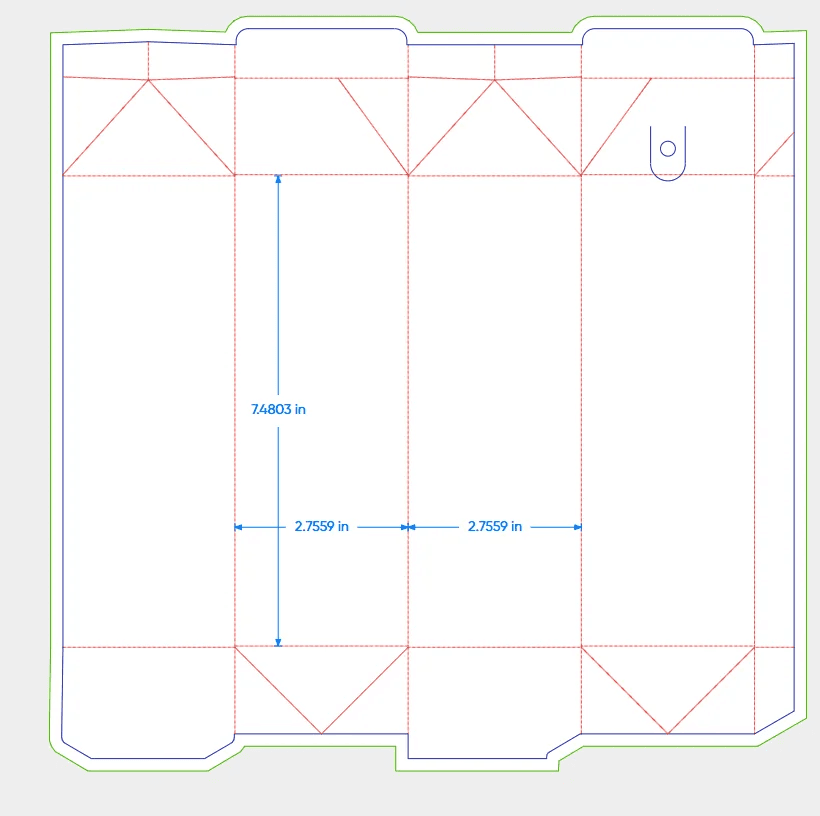
Design on Pacdora dielines when the structure matches your product. That is the point of a box dieline template. You change length, width, height, and board thickness. Pacdora rebuilds the cut and crease layout. You download it. You open it in Illustrator.
Draw your own only when the structure is custom. Odd trays. Nested inserts. Odd tuck locks. Most retail packs, mailers, and gift boxes do not need that from day one.
For a Labubu blind box style carton, start with a tuck-end or lid box template near your real size. Confirm glue flaps and dust flaps with your printer. Then design. Do not invent a dieline from a photo of a finished box. Photos hide scores and grain.
How to design on Pacdora dielines in Illustrator (step by step)
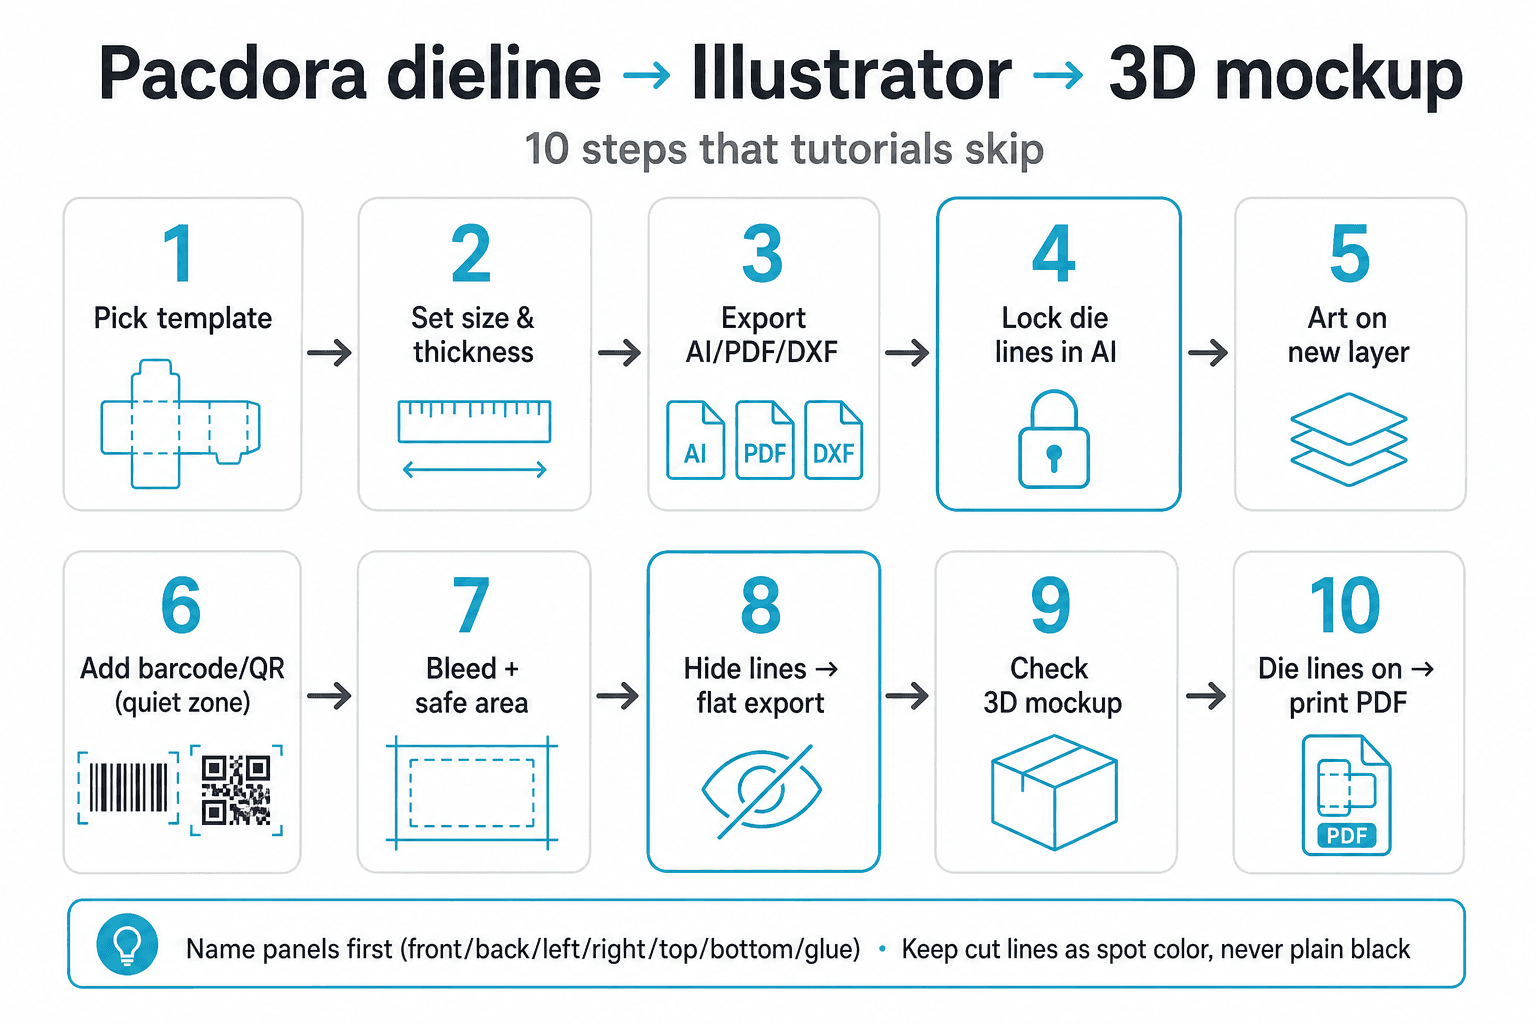
Many tutorials jump from pretty mockup to finished pack. They skip the handoff. Follow the chart above—then the short notes below.
Before you draw, zoom the dieline and name each panel on a guide layer: front, back, left, right, top, bottom, glue. When you wrap art in 3D, you will know which face you are editing.
Keep Pacdora cut lines as a spot color or locked stroke. Never convert them to plain black process ink unless your printer asks for that.
- 1–3: Pick a Pacdora dieline template, set size and board thickness, export AI/PDF/DXF.
- 4–5: Open in Illustrator. Lock the cut/fold layer. Build art, logos, and textures on a new layer.
- 6–7: Place barcode and QR in the quiet zone (never on folds). Extend color into bleed; keep text in the safe area.
- 8–9: Hide die lines, export a flat image, upload into Pacdora’s 3D packaging mockup, check seams and logo scale.
- 10: Turn die lines back on. Send the print PDF with spot colors or marked cut layers.
Print-ready checklist before you order samples
A sharp mockup can still fail at the die cutter. Run this checklist once.
Confirm units in millimeters or inches match the factory quote. Confirm board caliper. Confirm grain direction if the printer cares. Confirm barcode X-dimension and quiet zone for your symbol. Confirm varnish or soft-touch will not cover the code.
Ask for a white sample or a printed proof on the real stock. Approve folds by hand. Then scale the order. That habit saves more money than any coupon alone.
Where barcodes, UPC, QR, and labels fit
A packaging workflow still needs clean codes. Use a UPC generator for retail SKUs when you own or buy valid numbers. Use a barcode generator for Code 128 on cartons and warehouse labels. Use a QR code writer free tool for landing pages, manuals, or authenticity checks.
Place codes last, not first. Fix the panel map first. Then drop the symbol. Test scan a printed proof. Soft mockups lie. Ink and varnish can kill contrast.
Side note for mailers and envelopes: if you also print a ship label or envelope face, keep address blocks simple. How to write an envelope still follows the same rule in most markets: return address top-left or back flap, recipient centered. How to write from and to on an envelope is not packaging art. It is readability. Large type. High contrast. No busy patterns behind the address.
3D modeling and mockup workflow that clients understand
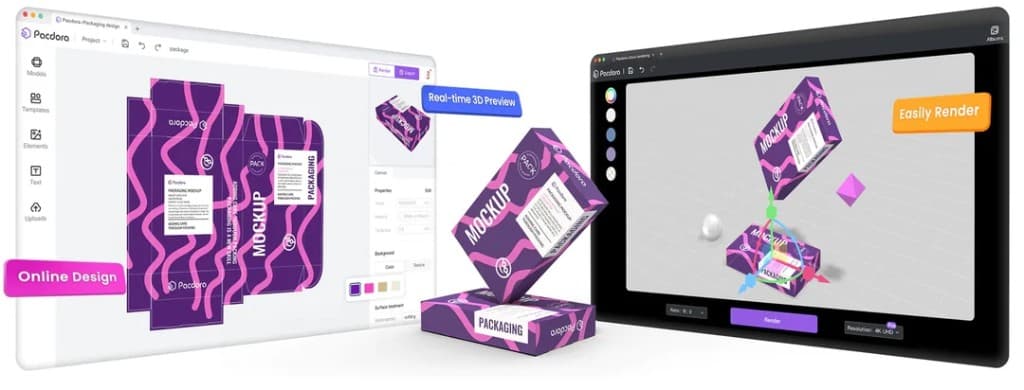
Pacdora’s 3D modeling tools help you set angle, light, and scene without a full CGI seat. Upload your flat design. Drop the pack into a studio scene. Adjust camera. Export a still or short video.
Use the packaging mockup generator for speed. Use deeper 3D modeling when you need shelf context, hand scale, or a gift-set story. For launches, one honest 3D model beats five flat JPEGs.
AI background remover and AI background tools help product shots when you lack a photo studio. Keep expectations real. AI cleans a product plate. It does not fix a bad dieline.
Pacdora plans: Free, Lite, Pro, Business
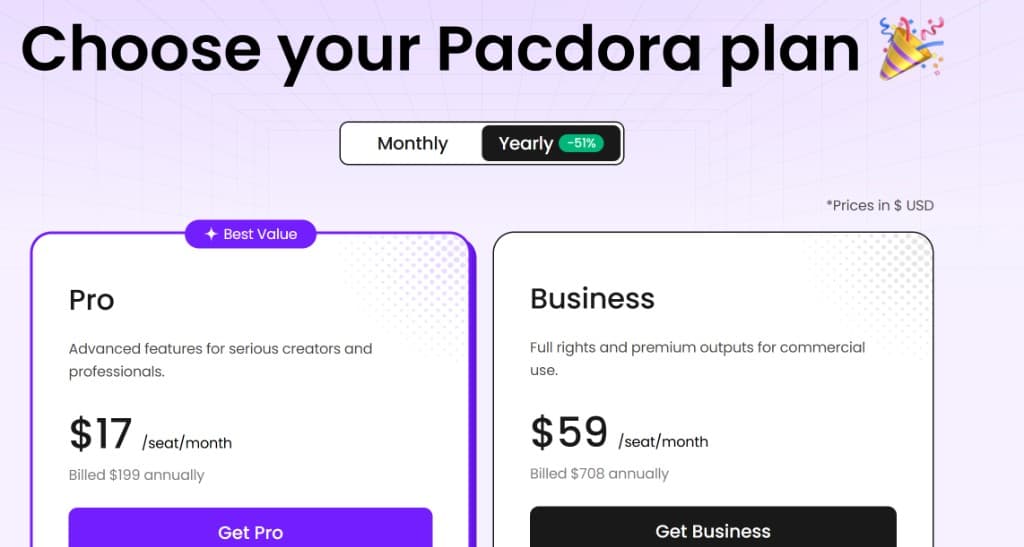
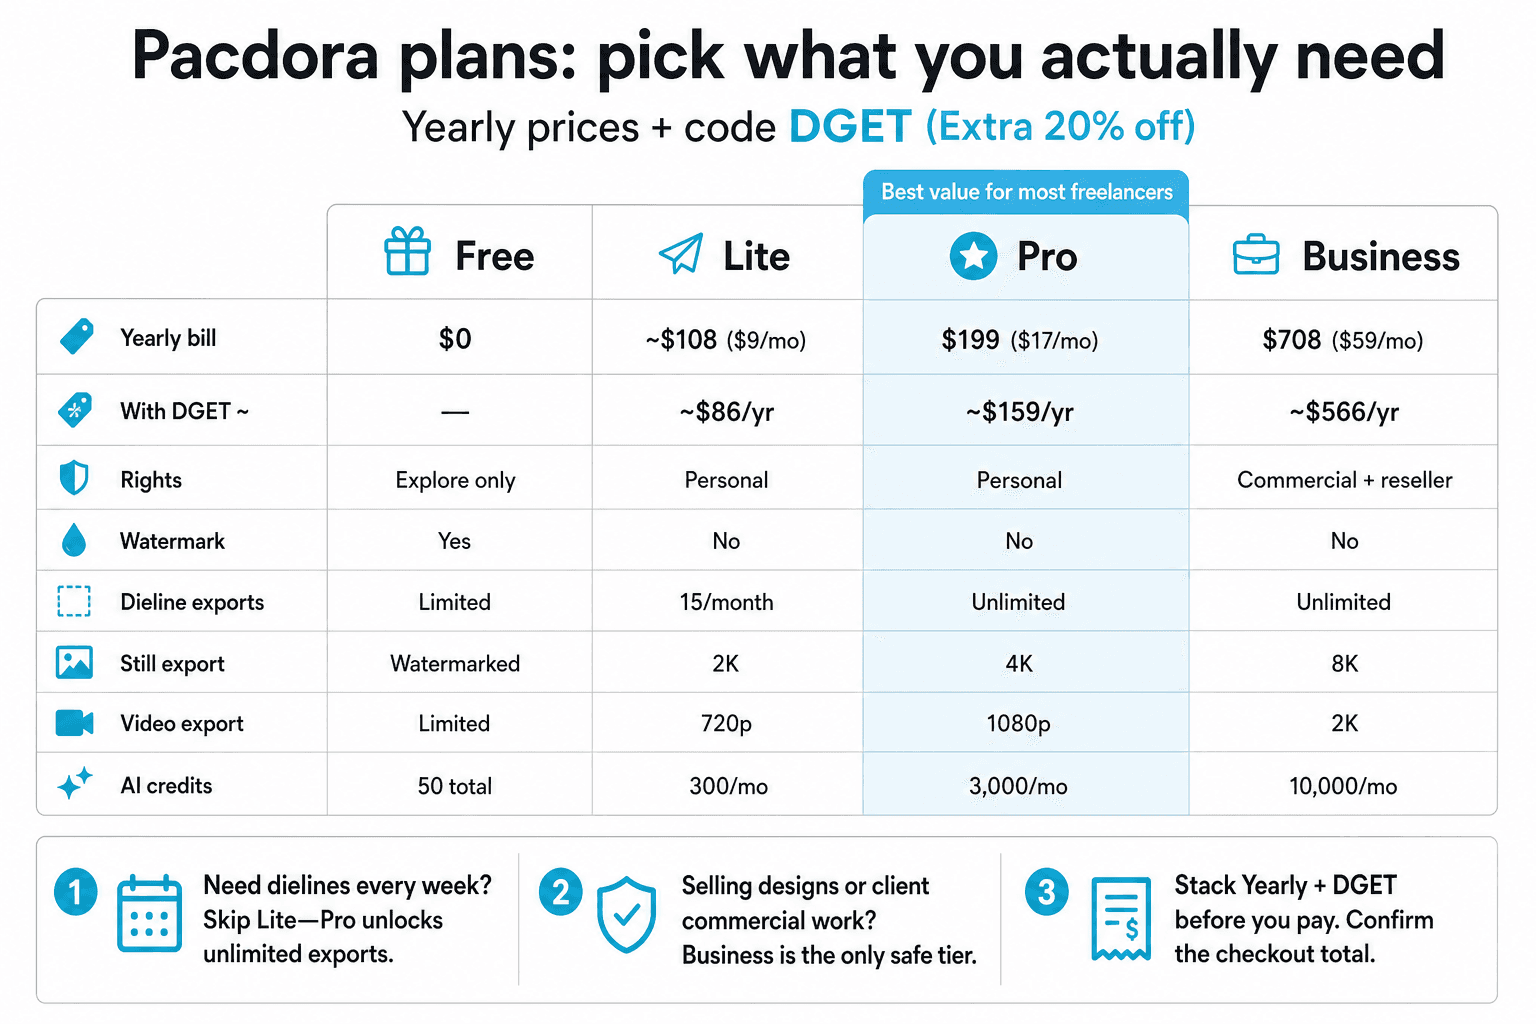
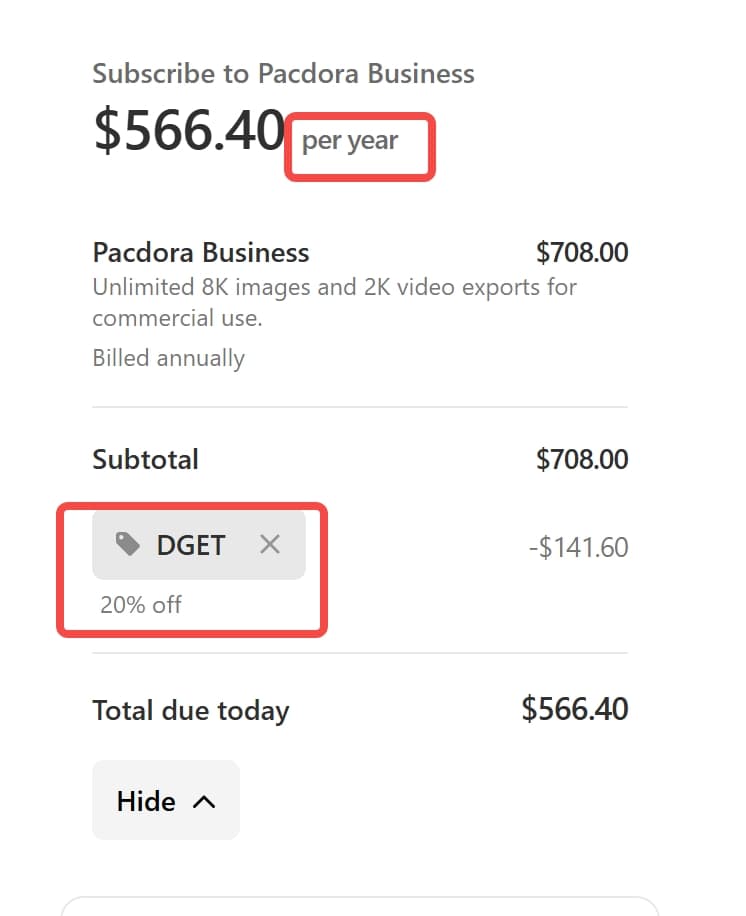
Yearly prices (mid-2026): Free $0, Lite ~$108/year, Pro $199/year, Business $708/year. With code DGET (20% off): Pro ~$159, Business ~$566, Lite ~$86. Confirm live prices on Pacdora before you pay.
- Free: learn the UI. Watermarks stay.
- Lite: watermark off, light dieline exports. Fine if you export rarely.
- Pro (~$159 with DGET): unlimited dielines, 4K stills. Best fit for most freelancers.
- Business (~$566 with DGET): commercial/reseller rights. Buy only when you need those rights.
How to subscribe and save money with code DGET
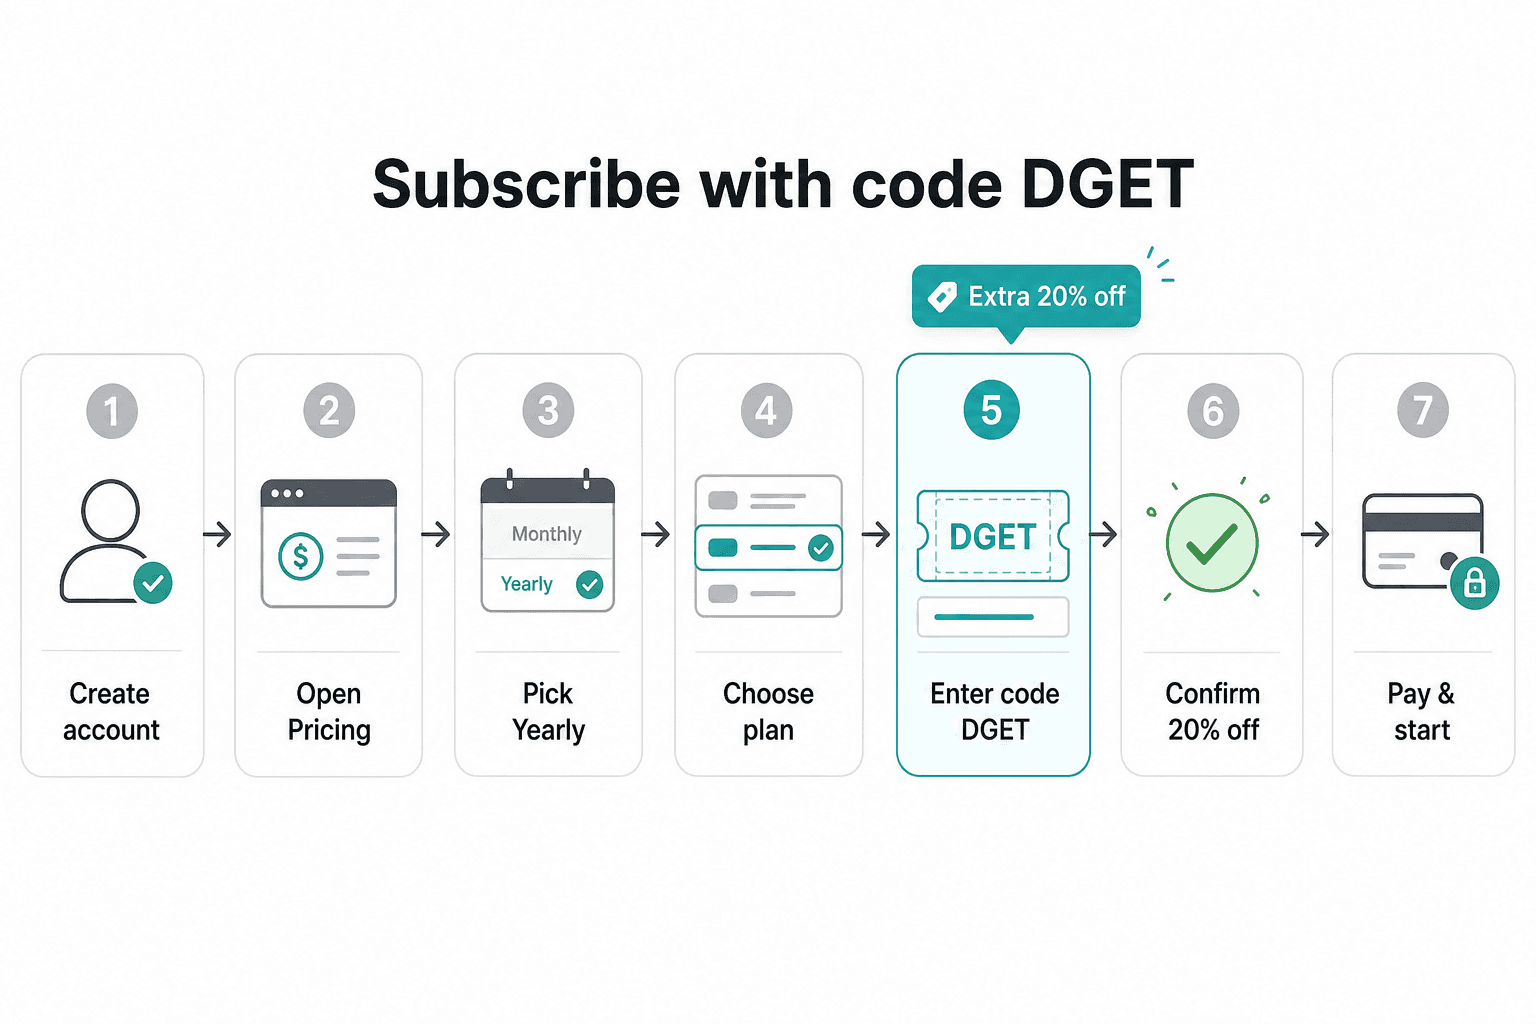
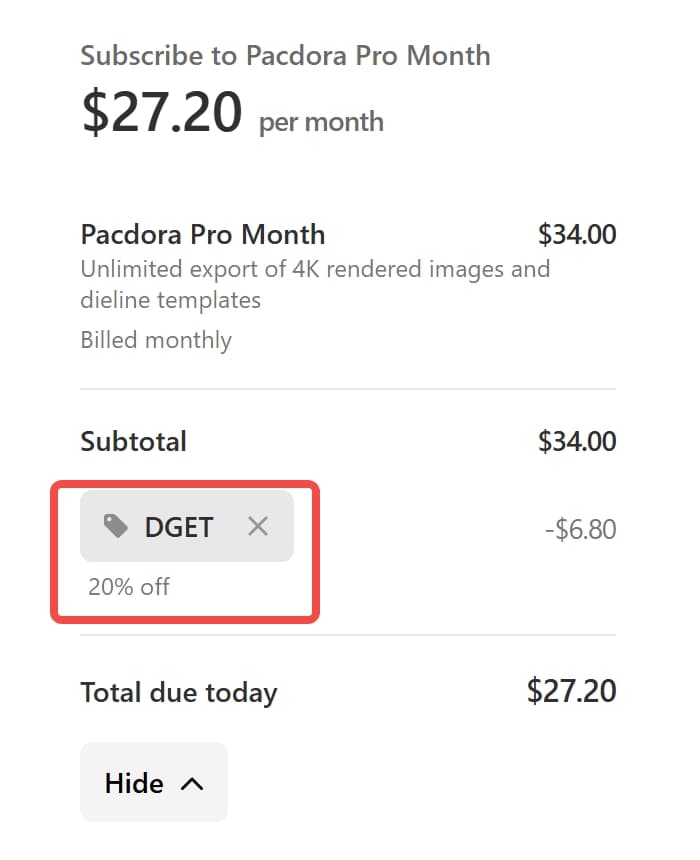
Pick Yearly billing, then enter DGET at checkout for Extra 20% off sitewide. Check that the discount shows on the total before you pay.
- Create an account at pacdora.com.
- Open Pricing and switch to Yearly.
- Choose Lite, Pro, or Business.
- At checkout, open “Have a promotion code?” and type DGET.
- Confirm 20% off appears, then pay.
A simple first project (mailer or product box)
Start with a mailer box or tuck-end product box. Set real product dimensions. Export the dieline. Design three panels only: front brand, side story, back barcode and claims. Upload to the mockup. Show one hero angle and one open angle.
If you also need a business card generator style insert or a hang tag, design those as separate flats. Do not force every asset onto one dieline.
For pouch brands and snack packs, pick a pouch mockup first. Confirm seal areas. Keep the barcode off the curve when you can. Curves distort narrow bars.
Common beginner mistakes
Mistake one: designing on a JPEG screenshot of a dieline. Always use vector cut files.
Mistake two: putting barcodes on folds, varnish, or low-contrast art. Scanners fail. Retailers reject.
Mistake three: trusting only the 3D preview for color. Soft-proof with your printer. Ask for a physical sample on the real board.
Mistake four: buying the wrong plan. If you need commercial rights, Lite and Pro personal-use limits will not cover you. Read the plan matrix.
Mistake five: skipping bleed. White edges on folds look amateur in every mockup and every print run.
Who should use Pacdora
Use Pacdora if you need speed: founders validating a box, designers pitching a 3D packaging mockup, small brands building a Labubu style gift carton, or teams that want AI packaging design drafts without a heavy desktop 3D stack.
Skip it as your only tool if you need enterprise structural engineering, full finite-element pack testing, or GS1 barcode issuance. Pair Pacdora with a printer, a proper UPC source, and a barcode generator that matches your symbol standard.
Final take
Pacdora earns a place in a modern packaging kit. You get a packaging dieline generator, a packaging mockup generator, and practical 3D modeling without a steep learning curve. Design on the exported die lines in Illustrator. Keep textures and art on separate layers. Hide guides when you export mockup images. Keep guides when you send print files.
If you’ll use Pacdora for a while, go yearly and apply DGET for Extra 20% off sitewide. Start with one real SKU. Prove the fold. Then scale.
Open Pacdora, pick one box dieline template, and run the ten-step Illustrator handoff above. That single loop teaches more than another abstract overview.
Frequently Asked Questions
Does Pacdora let you add textures to the preview?▾
Yes. Apply materials and artwork in the 3D preview. In Illustrator, keep textures on a layer above locked die lines, then hide die lines when you export a clean image for the mockup.
Should I design directly on Pacdora dielines?▾
Yes for standard structures. Export the Pacdora dieline, lock that layer in Illustrator, and design on a new layer. Build a custom dieline only when the structure is non-standard.
What is promo code DGET?▾
It’s Extra 20% off sitewide. At checkout, open “Have a promotion code?”, type DGET, and check that the discount shows on your total before you pay.
Which Pacdora plan should beginners buy?▾
Learn on Free. If you need watermark-free personal stills and light dieline use, try Lite. If you export die lines often, Pro yearly is usually the smarter spend—about $199/year, or roughly $159 with DGET. Choose Business only when you need commercial or reseller rights.
Is Pacdora a barcode generator?▾
No. Pacdora is for mockups, dielines, and 3D packaging views. Generate UPC, Code 128, or QR with a dedicated barcode generator or QR tool, then place the final symbol on your print artwork.
Can I cancel Pacdora anytime?▾
Yes. Manage the subscription in Workbench → Account → Subscription. You keep premium access until the paid period ends.